
I assured him he was a total bad ass; and the coach was even more of a bad ass, and if they lost they could just beat up the guy's on the other team afterwards. He agreed with this and went on to show me how big his biceps were. I didn't want to tell him the REAL reason he shouldn't be nervous: My lucky baseball bracelet! Duh.
Remember in this post, I told you all about how I was ready for baseball and even showed the lucky bracelet I made?
I've decided it's time you learned to make one. Mine has not only helped our team to a 2-0 record, but I've been pretty lucky in life since I made it. So feel free to make one even if you hate baseball.
**The only person who isn't allowed to make one is my friend, Jessika M., because we play her team this weekend. Two lucky bracelets from opposing sides might cause a black hole or a tear in the fabric of the universe....Got it, JESS?!**
STEP ONE: Gather your ingredients....

STEP TWO: Start on one side and cut around the seams. If you have proven yourself incapable of using a knife, don't hesitate to ask for help. I didn't ask, and then yelled at Chris for not helping me when the knife slipped and almost chopped off my finger:
 | |
| Layla is hoping Chris isn't serious about ruining a perfectly good ball and will throw it at any second. |
STEP THREE: Once you have cut around the ball, the 'guts' should come out easily.....
 |
| Layla still thinks that ball has potential for a quick game of fetch. I also apologize for my husband's un-gentlemanly pose. |
looking like this:
 |
| Is it just me or does the ball look like a muppet talking? |
STEP FOUR: Use scissors to cut along the seam. I'm allowed to use scissors so I did this ALL by myself:

STEP FIVE: Cut across the seam to separate it from itself. You'll get a 'seam snake'


STEP SIX: Peel off any remaining 'guts' off the back your 'seam snake':
 | |
| Can you make out the stringy things? Yeah peel those off. |

STEP EIGHT: Take out your wet 'snake seam' and stretch it...stretch it....stretch it, and let it dry straight:
I don't have a picture for this step so pretend I'm doing that.
STEP NINE: Measure the bracelet around your wrist and cut it to fit loosely:
I was too busy measuring to take a picture...The A.D.D made me do it!
STEP TEN: After you have cut the bracelet to fit loosely, pull the seams on both ends. This is how you connect your bracelet.

STEP ELEVEN: Depending on how tight/loose you want it keep pulling at the seams. I made mine loose so I pulled the seams even more than this picture shows....

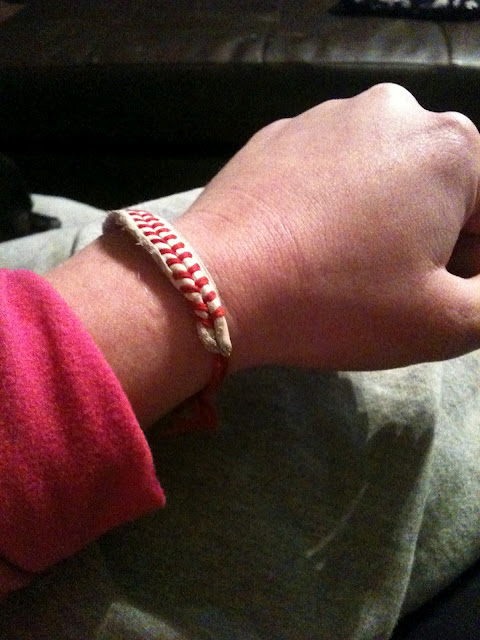
STEP TWELVE: Snip the excess leather on the top, and tie the baseball seams together
 |
| Some people use a clasp so they can take the bracelet on and off..... Not me! I'm a fan for |
Now that you have made the ultimate good luck charm....go out and help your team win the big game; or why not try something new? I promise the bracelet will NOT let you down.....
Remember my awesome win from Monday?
Totally because of the lucky bracelet.
P.S. If this made zero sense and you still want to make one, click here.
No comments:
Post a Comment